Introduction
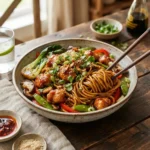
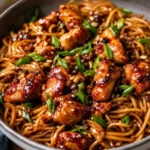
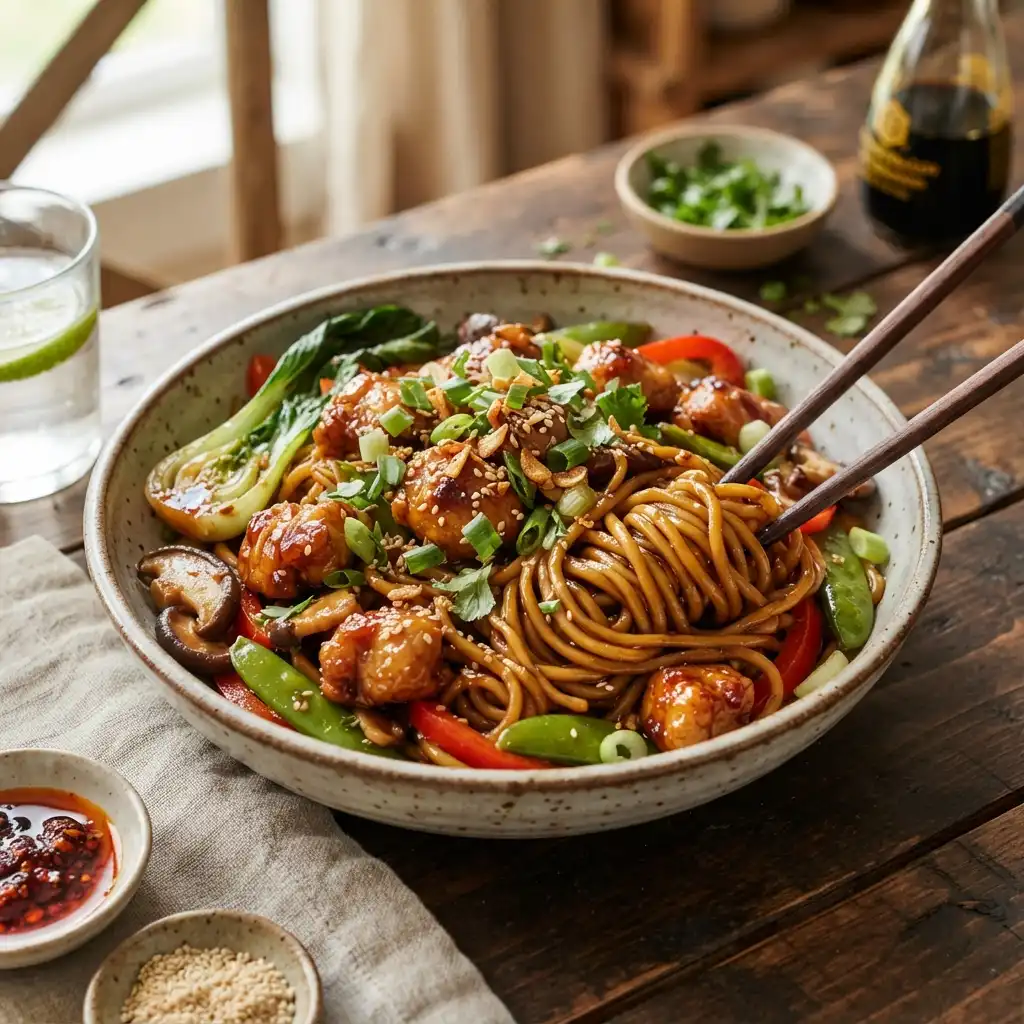
There are few culinary experiences as universally comforting and deeply satisfying as a bowl of Sticky Garlic Chicken Noodles. This dish represents the perfect harmony of textures and flavors, combining the chewy resilience of perfectly cooked noodles with the tender, juicy bite of seared chicken, all enveloped in a glossy, umami-rich garlic glaze. It is a meal that transcends boundaries, appealing to weeknight dinner seekers looking for speed, gourmet enthusiasts chasing depth of flavor, and comfort food lovers craving something warm and savory. The aroma alone, characterized by the pungent sweetness of caramelized garlic and the salty depth of soy sauce, is enough to gather anyone around the table.
What sets this dish apart from standard stir-fries is the sauce consistency. Unlike soupy noodle dishes or dry fried rice, sticky garlic noodles rely on a reduction technique that coats every strand and every piece of protein in a viscous, flavorful layer. This ensures that every single bite delivers a concentrated burst of savory, sweet, and aromatic notes. Whether you are a seasoned home cook or a beginner looking to expand your repertoire, mastering this dish provides a foundational skill set for countless other Asian-inspired fusion meals. It is versatile, forgiving, and infinitely customizable, making it a staple recipe that deserves a permanent place in your culinary rotation.
The History
The origins of Sticky Garlic Chicken Noodles are not tied to a single specific region but rather represent a beautiful evolution of Asian culinary traditions adapting to global tastes. The concept of garlic-based sauces dates back centuries in Chinese cuisine, where garlic was valued not only for its flavor but also for its medicinal properties. In traditional Cantonese cooking, garlic is often fried until golden to infuse oils, a technique that forms the backbone of many noodle dishes.
However, the specific “sticky” glaze profile draws significant influence from Japanese teriyaki techniques and Korean yangnyeom styles, where sugar and soy sauce are reduced to create a lacquer-like coating. As Asian immigration to the West increased throughout the 20th century, these flavors began to merge with local ingredients and preferences. The dish evolved in American Chinese takeout culture during the 1970s and 80s, where sweeter, thicker sauces became popular to appeal to broader palates. Today, Sticky Garlic Chicken Noodles stand as a modern fusion classic, honoring traditional aromatics while utilizing contemporary cooking methods to achieve a restaurant-quality finish at home.
Ingredients Breakdown
Understanding the role of each component is crucial to elevating this dish from good to exceptional. Below is a detailed analysis of the key players in this recipe.
The Protein: Chicken
Thighs vs. Breasts: While chicken breast is leaner, chicken thighs are highly recommended for this recipe. Thighs contain a higher fat content, which keeps them moist during the high-heat searing process required to develop a crust. If you prefer breast, ensure you do not overcook them, as they can become dry quickly. The chicken should be cut into uniform bite-sized pieces to ensure even cooking and maximum surface area for the sauce to cling to.
The Aromatics: Garlic and Ginger
Fresh Garlic: There is no substitute for fresh garlic in this dish. Jarred minced garlic often contains preservatives and water that can dilute the sauce and prevent proper caramelization. You want a high volume of garlic, finely minced or grated, to distribute the flavor evenly throughout the glaze. Fresh Ginger: Ginger adds a necessary spicy warmth that cuts through the sweetness of the sauce. It balances the pungency of the garlic and adds a layer of complexity that defines authentic Asian flavor profiles.
The Sauce Components
Soy Sauce: A combination of light and dark soy sauce is ideal. Light soy sauce provides the necessary saltiness without darkening the dish too much, while dark soy sauce adds a rich color and a slightly molasses-like depth. Sweeteners: Brown sugar or honey is used to create the “sticky” factor. When heated, these sugars caramelize and thicken the liquid. Cornstarch: This is the binding agent. Mixed with water to create a slurry, it thickens the sauce upon heating, ensuring it coats the noodles rather than pooling at the bottom of the bowl.
The Noodles
Type Matters: You can use wheat-based egg noodles, ramen noodles, or even rice noodles. Wheat noodles generally hold the sauce better due to their porous texture. Fresh noodles cook faster and have a better chew than dried varieties, but high-quality dried noodles work well if cooked al dente. The starch on the surface of the noodles helps emulsify the sauce, so avoid rinsing them after cooking unless you are using rice noodles to prevent sticking.
Step-by-Step Recipe
Follow this comprehensive guide to ensure your Sticky Garlic Chicken Noodles turn out perfectly every time. Precision in timing and heat management is key.
Phase 1: Preparation and Mise en Place
Before you turn on the stove, ensure all ingredients are prepped. Asian cooking moves quickly, and you do not want to be chopping garlic while your sauce is burning. Mince the garlic and ginger, cut the chicken into uniform cubes, and measure out all sauce ingredients into a small bowl. Whisk the cornstarch into the cold water separately to ensure there are no lumps. Boil a large pot of salted water for the noodles.
Phase 2: Cooking the Noodles
Drop the noodles into the boiling water. Cook them until they are just shy of al dente, as they will continue to cook slightly when tossed with the hot chicken and sauce later. Drain the noodles, reserving a small cup of the starchy pasta water just in case the sauce needs thinning. Toss the noodles with a tiny drop of sesame oil to prevent them from clumping together while you finish the protein.
Phase 3: Searing the Chicken
Heat a large skillet or wok over medium-high heat. Add a high-smoke-point oil like vegetable or canola oil. Once the oil shimmers, add the chicken pieces in a single layer. Do not overcrowd the pan; if necessary, cook in batches. Overcrowding steams the chicken rather than searing it. Let the chicken cook undisturbed for 3-4 minutes to develop a golden-brown crust before flipping. Cook until the internal temperature reaches 165°F (74°C).
Phase 4: Building the Glaze
Push the chicken to the side of the pan or remove it temporarily. Add a bit more oil if needed and toss in the minced garlic and ginger. Sauté for about 30 seconds until fragrant but not browned. Pour in the sauce mixture (soy sauce, sugar, vinegar, etc.). Bring to a simmer. Give the cornstarch slurry a final whisk and pour it into the simmering sauce while stirring constantly. The sauce will thicken rapidly within 30 to 60 seconds.
Phase 5: Combining and Serving
Add the cooked noodles and the seared chicken back into the skillet with the sauce. Toss everything together using tongs, ensuring every piece is coated in the glossy glaze. If the mixture looks too dry, add a splash of the reserved pasta water. Garnish immediately with sliced green onions and sesame seeds, then serve while hot.
Tips
To guarantee success and troubleshoot common issues, keep these professional tips in mind:
- Heat Control: Garlic burns very quickly. Once you add it to the pan, keep it moving. If the garlic turns dark brown, it will taste bitter and ruin the sauce.
- Sauce Consistency: If your sauce is too thick, add water one tablespoon at a time. If it is too thin, mix a little more cornstarch with cold water and add it to the simmering sauce.
- Seasoning Balance: Taste your sauce before adding the chicken and noodles. If it is too salty, add a pinch of sugar. If it is too sweet, add a splash of rice vinegar or lime juice.
- Prep Ahead: You can marinate the chicken in a little soy sauce and pepper up to 24 hours in advance to deepen the flavor penetration.
- Equipment: A wok is ideal for tossing, but a large stainless steel skillet works perfectly well. Non-stick pans are easier for cleanup but may not sear the chicken as aggressively.
Variations and Customizations
This recipe is a canvas for your culinary creativity. Here are several ways to adapt the dish to suit different dietary needs and flavor preferences:
Spicy Kick
For those who enjoy heat, add dried red chili flakes to the garlic while sautéing, or incorporate a tablespoon of Sriracha or Chili Garlic Sauce into the liquid sauce mixture. Fresh jalapeños can also be sliced and added as a garnish.
Vegetarian and Vegan
Replace the chicken with extra-firm tofu or seitan. Ensure the tofu is pressed to remove excess water before cubing and frying. Use coconut aminos instead of soy sauce for a gluten-free and soy-free option, and substitute honey with maple sugar or agave for a vegan-friendly sweetener.
Vegetable Boost
Increase the nutritional density by adding broccoli florets, snap peas, bell peppers, or baby corn. These should be blanched or stir-fried separately before being added to the final toss to ensure they remain crisp and vibrant.
Noodle Alternatives
For a low-carb version, substitute traditional noodles with zucchini noodles (zoodles) or shirataki noodles. Add these at the very end of the cooking process just to warm them through, as they can become mushy if cooked too long.
Health Considerations and Nutritional Value
While delicious, Sticky Garlic Chicken Noodles can be calorie-dense depending on portion sizes and ingredient choices. A standard serving contains a significant amount of carbohydrates from the noodles and sugars from the glaze. However, it is also high in protein, which aids in satiety and muscle repair.
Sodium Content: Soy sauce is naturally high in sodium. To manage this, look for low-sodium soy sauce varieties or dilute regular soy sauce with water. Sugar Content: The sticky glaze relies on sugar. You can reduce the sugar by half without significantly affecting the texture, relying on the natural sweetness of caramelized onions or garlic to compensate. Fiber: Using whole wheat noodles or adding substantial vegetables increases the fiber content, aiding in digestion and blood sugar regulation. Healthy Fats: Using sesame oil for finishing adds healthy monounsaturated fats and antioxidants.
Ingredients
- Chicken: 1.5 lbs boneless, skinless chicken thighs, cut into 1-inch cubes
- Noodles: 1 lb fresh or dried wheat noodles (ramen, egg noodles, or udon)
- Garlic: 8-10 cloves, finely minced or grated
- Ginger: 1 tablespoon fresh ginger, peeled and minced
- Soy Sauce: 1/2 cup (use low-sodium if preferred)
- Brown Sugar: 1/3 cup, packed
- Rice Vinegar: 2 tablespoons
- Sesame Oil: 1 tablespoon (toasted)
- Cornstarch: 1 tablespoon mixed with 2 tablespoons cold water (slurry)
- Oil for Cooking: 2 tablespoons vegetable or canola oil
- Garnish: Sliced green onions, toasted sesame seeds, fresh cilantro
- Optional: Red pepper flakes for heat
Directions
- Prepare the Noodles: Bring a large pot of salted water to a boil. Cook noodles according to package instructions until al dente. Drain and toss with a drop of oil to prevent sticking. Set aside.
- Make the Sauce: In a small bowl, whisk together the soy sauce, brown sugar, rice vinegar, and toasted sesame oil. In a separate small cup, mix the cornstarch and cold water until smooth.
- Sear the Chicken: Heat vegetable oil in a large skillet or wok over medium-high heat. Add chicken cubes in a single layer. Cook for 4-5 minutes per side until golden brown and cooked through. Remove chicken from the pan and set aside.
- Sauté Aromatics: In the same pan, add a little more oil if needed. Add minced garlic and ginger. Sauté for 30-45 seconds until fragrant, being careful not to burn.
- Thicken the Sauce: Pour in the soy sauce mixture and bring to a simmer. Stir the cornstarch slurry again and pour it into the pan. Cook for 1-2 minutes, stirring constantly, until the sauce thickens and becomes glossy.
- Combine: Return the cooked chicken to the pan. Add the cooked noodles. Toss everything together until evenly coated in the sticky glaze.
- Serve: Transfer to serving bowls. Garnish generously with green onions, sesame seeds, and cilantro. Serve immediately while hot.
FAQ
Can I make this dish gluten-free?
Yes, simply substitute the wheat noodles with rice noodles or gluten-free pasta. Additionally, ensure you use Tamari or a certified gluten-free soy sauce instead of regular soy sauce.
How do I store leftovers?
Store leftovers in an airtight container in the refrigerator for up to 3 days. When reheating, add a splash of water to the pan or microwave to loosen the sauce, as noodles tend to absorb the liquid over time.
Can I freeze this meal?
While you can freeze the chicken and sauce separately, it is not recommended to freeze the noodles together as they can become mushy and lose their texture upon thawing. Freeze the protein and sauce for up to 2 months.
Why is my sauce not sticky?
This usually happens if the cornstarch slurry was not added to a simmering liquid or if too much liquid was added. Ensure the sauce is bubbling when you add the cornstarch, and let it cook for at least a minute to activate the thickening properties.
What can I use instead of chicken?
This recipe works beautifully with shrimp, beef strips, pork tenderloin, or tofu. Adjust the cooking time accordingly, as seafood cooks much faster than chicken.
Summary
Sticky Garlic Chicken Noodles combine seared chicken and chewy noodles in a sweet, savory, umami-rich garlic glaze for a perfect weeknight meal.
Customizable with various vegetables and proteins, this dish delivers restaurant-quality flavor with simple ingredients and quick preparation steps.