Introduction
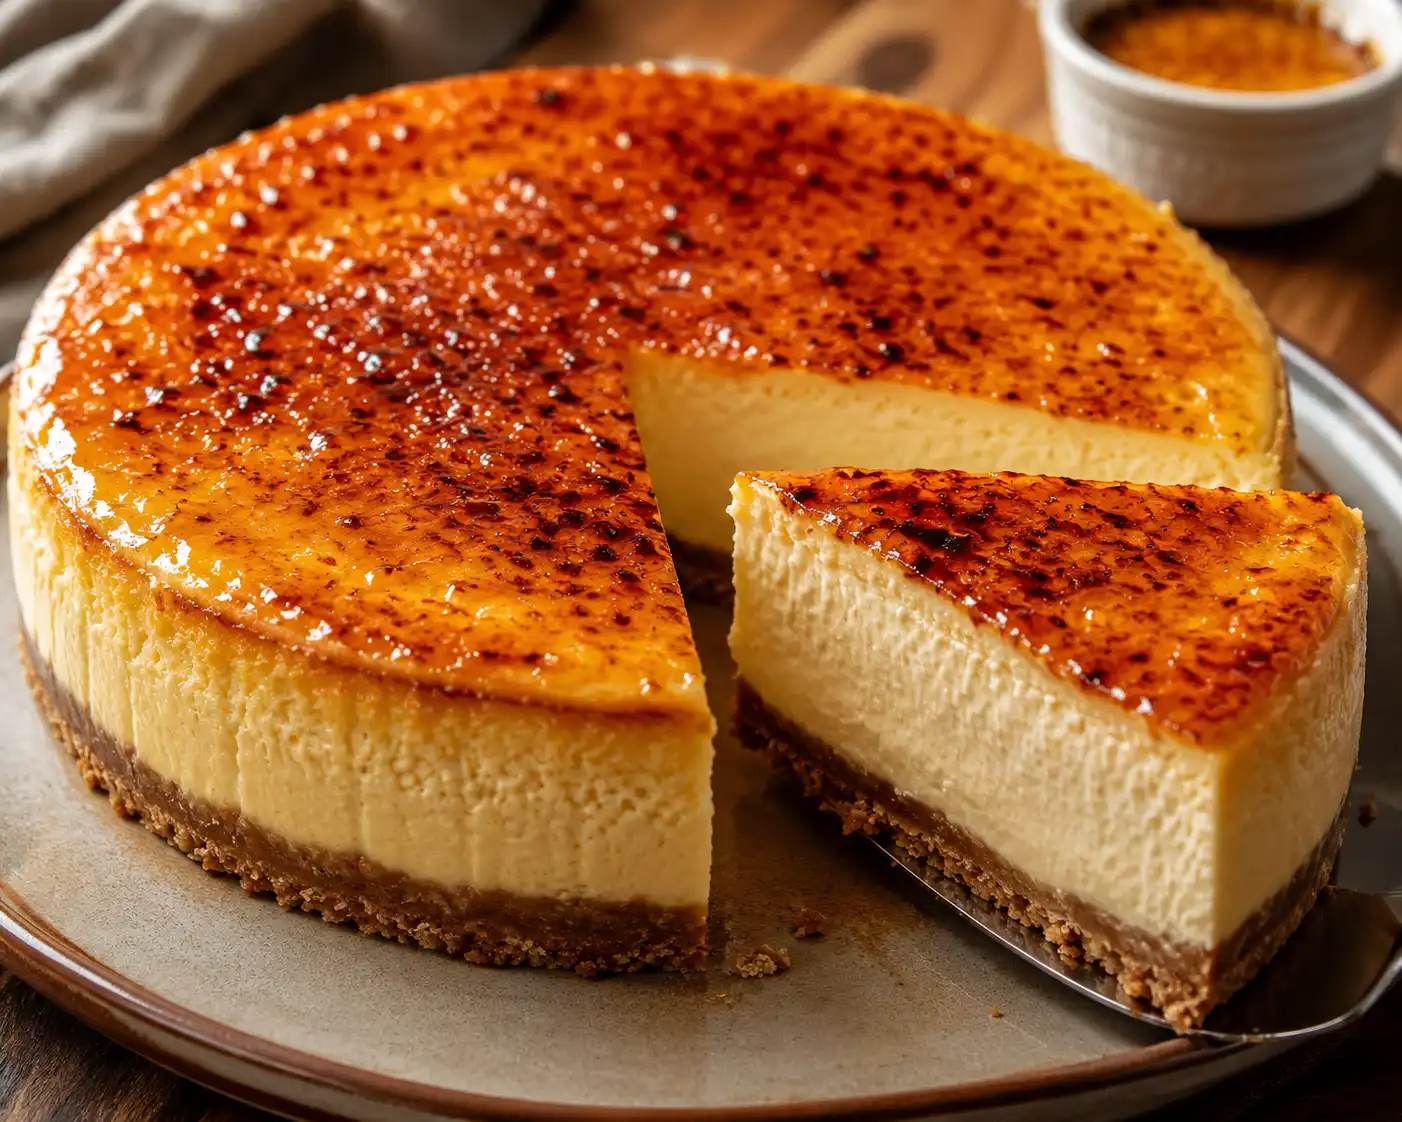
There are few desserts in the culinary world that command the same level of reverence and anticipation as the Crème Brûlée Cheesecake. This decadent hybrid represents the pinnacle of textural contrast and flavor harmony, marrying the dense, creamy richness of a classic New York-style cheesecake with the delicate, custard-like silkiness of a traditional French crème brûlée. The experience begins before the first bite even touches your lips; it starts with the satisfying auditory crack of the caramelized sugar shell as your spoon breaks through the surface. Beneath that brittle, sweet crust lies a filling that is simultaneously substantial and ethereal, offering a vanilla-infused creaminess that lingers on the palate. This dessert is not merely a treat; it is an event, perfect for special occasions, dinner parties, or any moment where ordinary sweetness simply will not suffice. In this comprehensive guide, we will explore every facet of creating this masterpiece, from the historical roots of its components to the scientific nuances of baking the perfect custard.
The History
To understand the Crème Brûlée Cheesecake, one must first appreciate the lineage of its two parent desserts. The concept of cheesecake dates back to ancient Greece, where it was served to athletes during the first Olympic Games in 776 BC as a source of energy. The Romans later adopted the recipe, adding flour and baking it under hot bricks, eventually spreading the concept throughout Europe. However, the modern cream cheese-based cheesecake is largely an American innovation, popularized in New York City during the early 20th century by establishments like Lindy’s and Junior’s, which perfected the dense, smooth texture we recognize today.
Conversely, the crème brûlée, meaning “burnt cream” in French, has a more debated origin story. While often associated with French cuisine, similar recipes appear in English cookbooks from the 17th century under the name “burnt cream,” and even in Spanish Catalonia as crema catalana. The definitive recipe appeared in François Massialot’s Le Cuisinier Royal et Bourgeois in 1691. The hallmark of this dessert is the layer of hard caramel created by torching sugar on top of a rich vanilla custard. The fusion of these two giants into a single dessert is a modern culinary evolution, likely emerging in the late 20th century as pastry chefs began experimenting with texture contrasts. By incorporating the caramelized sugar topping onto the stable structure of a cheesecake, bakers created a dessert that offers the best of both worlds: the structural integrity to slice cleanly and the delicate crunch of a classic brûlée.
Ingredients Breakdown
Creating the perfect Crème Brûlée Cheesecake requires more than just mixing ingredients; it requires understanding the role each component plays in the final chemistry of the bake. Here is a detailed analysis of what goes into the batter and why quality matters.
Full-Fat Cream Cheese
The backbone of any cheesecake is the cream cheese. It is imperative to use full-fat, brick-style cream cheese rather than tub spreads or reduced-fat varieties. The fat content provides the luxurious mouthfeel and stability needed to hold the structure. Reduced-fat options contain more water and stabilizers, which can lead to a weeping cake or a rubbery texture. The proteins in the cream cheese coagulate during baking to set the cake, while the fat ensures it remains creamy rather than becoming eggy.
Granulated Sugar vs. Turbinado Sugar
Inside the batter, standard granulated sugar is used to sweeten the mixture and help dissolve into the cream cheese smoothly. However, for the signature topping, turbinado or raw sugar is often preferred over white sugar. The larger crystals of turbinado sugar caramelize more evenly and provide a thicker, more substantial crunch that contrasts better with the dense cheesecake filling. White sugar can melt too quickly and create a thin, glass-like shard that might be too sharp.
Heavy Cream and Sour Cream
To achieve the “crème brûlée” aspect of the flavor profile, heavy cream is added to the batter to increase the fat content and mimic the richness of a custard. Sour cream is equally critical; its acidity tang balances the sweetness and reacts with the baking soda (if used) or simply tenderizes the proteins, ensuring the cheesecake remains moist and does not dry out during the cooling process.
Eggs
Eggs act as the primary binding agent. They provide structure through coagulation. Using large eggs at room temperature is crucial to prevent lumps in the batter. Overbeating eggs incorporates too much air, which expands during baking and causes the cheesecake to rise and then collapse, leading to surface cracks. The yolks specifically add emulsifiers that create a smoother, richer texture.
Vanilla Bean Paste
Since this dessert is named after a vanilla custard, the vanilla flavor must be prominent. Vanilla extract is acceptable, but vanilla bean paste or the seeds from a whole vanilla pod provide the speckled visual appeal and a deeper, more complex flavor profile that elevates the dessert from standard to gourmet.
The Crust
Traditionally, a graham cracker crust is used for its slight honeyed sweetness and sturdy texture. However, the crust must be pre-baked to ensure it remains crisp against the wet filling. Butter acts as the glue, solidifying when chilled to hold the crumbs together. A pinch of salt in the crust is essential to cut through the sweetness of the filling and topping.
Step-by-Step Recipe
This section provides a narrative walkthrough of the baking process, focusing on the techniques that ensure success. Follow this guide to understand the how and why of each movement in the kitchen.
Phase 1: Preparation and Crust Construction
Begin by preheating your oven to a moderate temperature, usually around 325°F (160°C). This lower temperature is vital for gentle cooking. Prepare a 9-inch springform pan by wrapping the bottom and sides tightly with heavy-duty aluminum foil. This step is non-negotiable if you plan to use a water bath, as it prevents water from seeping into the crust and making it soggy. Combine your crushed graham crackers with melted butter and a pinch of salt. Press this mixture firmly into the bottom and slightly up the sides of the pan using the bottom of a measuring cup to ensure an even layer. Bake this crust for about 10 minutes until fragrant, then let it cool completely while you prepare the filling. A warm crust can melt the butter in the filling prematurely.
Phase 2: The Filling Emulsion
Ensure all dairy ingredients are at room temperature. Cold cream cheese leads to lumps, forcing you to overmix the batter, which introduces air bubbles. In a stand mixer fitted with a paddle attachment, beat the cream cheese and sugar on low speed until completely smooth. Scrape down the bowl frequently. Add the sour cream and heavy cream, mixing gently. Finally, add the eggs one at a time, mixing only until just combined. Stop the mixer as soon as the last egg disappears. Overmixing at this stage is the primary cause of cracking. Stir in the vanilla bean paste by hand to ensure even distribution without aerating the batter.
Phase 3: The Water Bath and Baking
Place the foil-wrapped springform pan into a large roasting pan. Pour the cheesecake batter over the cooled crust. Boil a kettle of water. Place the roasting pan in the oven, then carefully pour the hot water into the roasting pan until it reaches halfway up the sides of the springform pan. This water bath creates a humid environment that regulates the heat, preventing the edges from cooking faster than the center. Bake for approximately 60 to 75 minutes. The cheesecake is done when the edges are set but the center still jiggles slightly like Jell-O when you gently shake the pan. This residual heat will continue to cook the center as it cools.
Phase 4: The Cooling Process
Turn off the oven and crack the door open slightly with a wooden spoon. Let the cheesecake sit in the cooling oven for an hour. This gradual temperature change prevents thermal shock, which causes cracks. Afterward, remove it from the water bath and let it cool completely on a wire rack at room temperature. Once cool, refrigerate for at least 6 hours, preferably overnight. The cheesecake must be thoroughly chilled to set completely before you add the topping.
Phase 5: The Brûlée Finish
Just before serving, sprinkle a thin, even layer of turbinado sugar over the top of the chilled cheesecake. Use a kitchen torch to caramelize the sugar, moving the flame in circular motions until the sugar melts and turns amber. Let the sugar harden for a minute before slicing. This ensures the signature crunchy shell.
Tips
Even experienced bakers can encounter challenges with cheesecake. Here are expert tips to troubleshoot and refine your technique.
- Prevent Cracks: Besides using a water bath and cooling gradually, avoid opening the oven door during the first 50 minutes of baking. Sudden drops in temperature can cause the surface to contract too quickly.
- Room Temperature is Key: Take your cream cheese, eggs, and sour cream out of the fridge at least two hours before baking. This ensures a smooth batter without lumps.
- Water Bath Safety: If you are worried about foil leaking, place the springform pan inside a slightly larger solid pan before placing it in the water bath roasting pan for double protection.
- Knife Cleaning: When slicing the cheesecake, dip your knife in hot water and wipe it dry between each cut. This ensures clean, sharp slices without dragging the filling.
- Torching Technique: Do not hold the torch too close to the sugar, or it will burn and taste bitter before it caramelizes. Keep the flame moving constantly.
- Storage: Do not apply the sugar topping until you are ready to serve. If left in the fridge, the sugar will absorb moisture from the filling and become soft and sticky rather than crunchy.
Variations and Customizations
While the vanilla bean profile is classic, the Crème Brûlée Cheesecake is a versatile canvas for various flavor infusions and dietary adjustments.
Flavor Infusions
Citrus Zest: Add lemon or orange zest to the batter for a bright, aromatic twist that cuts through the richness. This pairs exceptionally well with the caramelized sugar top.
Chocolate Swirl: Melt some dark chocolate and swirl it into the batter before baking for a marble effect. This creates a decadent chocolate-vanilla experience.
Fruit Compote: Instead of torching sugar, some variations top the cheesecake with a berry compote. However, to maintain the “brûlée” identity, you can torch the sugar and serve the compote on the side.
Crust Alternatives
Gluten-Free: Substitute graham crackers with gluten-free cookie crumbs or almond flour mixed with butter for a nutty, grain-free base.
Chocolate Crust: Use crushed chocolate wafer cookies or Oreos (without the filling) for a darker, richer crust that complements the vanilla filling.
Shortbread: Crushed shortbread cookies provide a buttery, crumbly texture that feels more European and pairs beautifully with the custard elements.
Dietary Adjustments
For a lower sugar option, erythritol or monk fruit sweeteners can be used in the batter and for the topping. Note that sugar substitutes caramelize differently; some may not harden as crisply as real sugar, so testing is recommended.
Health Considerations and Nutritional Value
It is important to approach this dessert with an understanding of its nutritional density. Crème Brûlée Cheesecake is an indulgent treat, high in calories, saturated fats, and sugars. A single slice can contain upwards of 400 to 600 calories, depending on the size and specific ingredients used. The primary sources of calories are the cream cheese, heavy cream, and sugar. While it provides some calcium and protein from the dairy and eggs, it should be consumed in moderation as part of a balanced diet.
For those with dietary restrictions, the dessert contains gluten (in the graham cracker crust) and high levels of lactose. However, modifications can be made. Using a nut-based crust eliminates gluten, and lactose-free cream cheese can accommodate those with sensitivities. For heart health considerations, the high saturated fat content suggests that portion control is essential. Enjoying a smaller slice paired with fresh fruit can help balance the meal by adding fiber and vitamins, slowing the absorption of sugar into the bloodstream.
Ingredients
For the Crust:
- 2 cups graham cracker crumbs (about 12 full sheets)
- 1/2 cup unsalted butter, melted
- 1/4 cup granulated sugar
- 1/4 teaspoon salt
For the Cheesecake Filling:
- 32 ounces (4 packages) full-fat cream cheese, room temperature
- 1 cup granulated sugar
- 1 cup sour cream, room temperature
- 1/2 cup heavy cream, room temperature
- 4 large eggs, room temperature
- 1 tablespoon vanilla bean paste (or 2 teaspoons pure vanilla extract)
- 1/4 teaspoon salt
For the Brûlée Topping:
- 1/2 cup turbinado sugar or raw sugar
Directions
- Preheat your oven to 325°F (160°C). Wrap the outside of a 9-inch springform pan tightly with two layers of heavy-duty aluminum foil.
- In a medium bowl, mix the graham cracker crumbs, melted butter, 1/4 cup sugar, and salt until combined. Press firmly into the bottom of the prepared pan. Bake for 10 minutes, then remove and let cool.
- In a large bowl or stand mixer, beat the cream cheese and 1 cup sugar on low speed until smooth and creamy, about 2 minutes. Scrape down the sides of the bowl.
- Add the sour cream, heavy cream, vanilla, and salt. Mix on low until combined.
- Add the eggs one at a time, mixing on low speed just until blended. Do not overmix.
- Pour the batter over the cooled crust. Place the springform pan inside a large roasting pan.
- Boil water in a kettle. Place the roasting pan in the oven, then carefully pour hot water into the roasting pan until it reaches halfway up the sides of the springform pan.
- Bake for 60 to 75 minutes. The edges should be set, but the center should still jiggle slightly.
- Turn off the oven. Crack the door open slightly and let the cheesecake cool in the oven for 1 hour.
- Remove from the oven and water bath. Cool completely on a wire rack, then refrigerate for at least 6 hours or overnight.
- Just before serving, sprinkle the turbinado sugar evenly over the top. Use a kitchen torch to caramelize the sugar until golden brown.
- Let the sugar harden for 1 minute, then slice and serve.
FAQ
Why did my cheesecake crack on top?
Cracking is usually caused by overmixing the batter (which incorporates too much air), baking at too high a temperature, or cooling too quickly. Always use a water bath and cool the cake gradually in the oven.
Can I make this cheesecake ahead of time?
Yes, this dessert actually benefits from being made ahead. You can bake and chill the cheesecake up to 3 days in advance. Just wait to torch the sugar topping until right before serving to maintain the crunch.
What if I don’t have a kitchen torch?
You can use the broiler setting on your oven. Place the sugared cheesecake on the top rack and broil for 1 to 3 minutes, watching closely to prevent burning. However, a torch offers more control.
How do I store leftovers?
Store leftovers in an airtight container in the refrigerator for up to 5 days. Note that the caramelized sugar topping will soften over time in the fridge.
Can I freeze this cheesecake?
It is best to freeze the cheesecake before adding the sugar topping. Wrap it tightly in plastic wrap and foil. It can be frozen for up to 2 months. Thaw overnight in the refrigerator before torching the sugar.
Summary
Crème Brûlée Cheesecake combines the creamy density of New York cheesecake with the caramelized crunch of French custard.
Master the water bath and torching technique for a flawless, restaurant-quality dessert experience at home.