Introduction
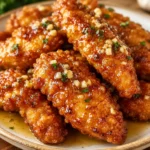
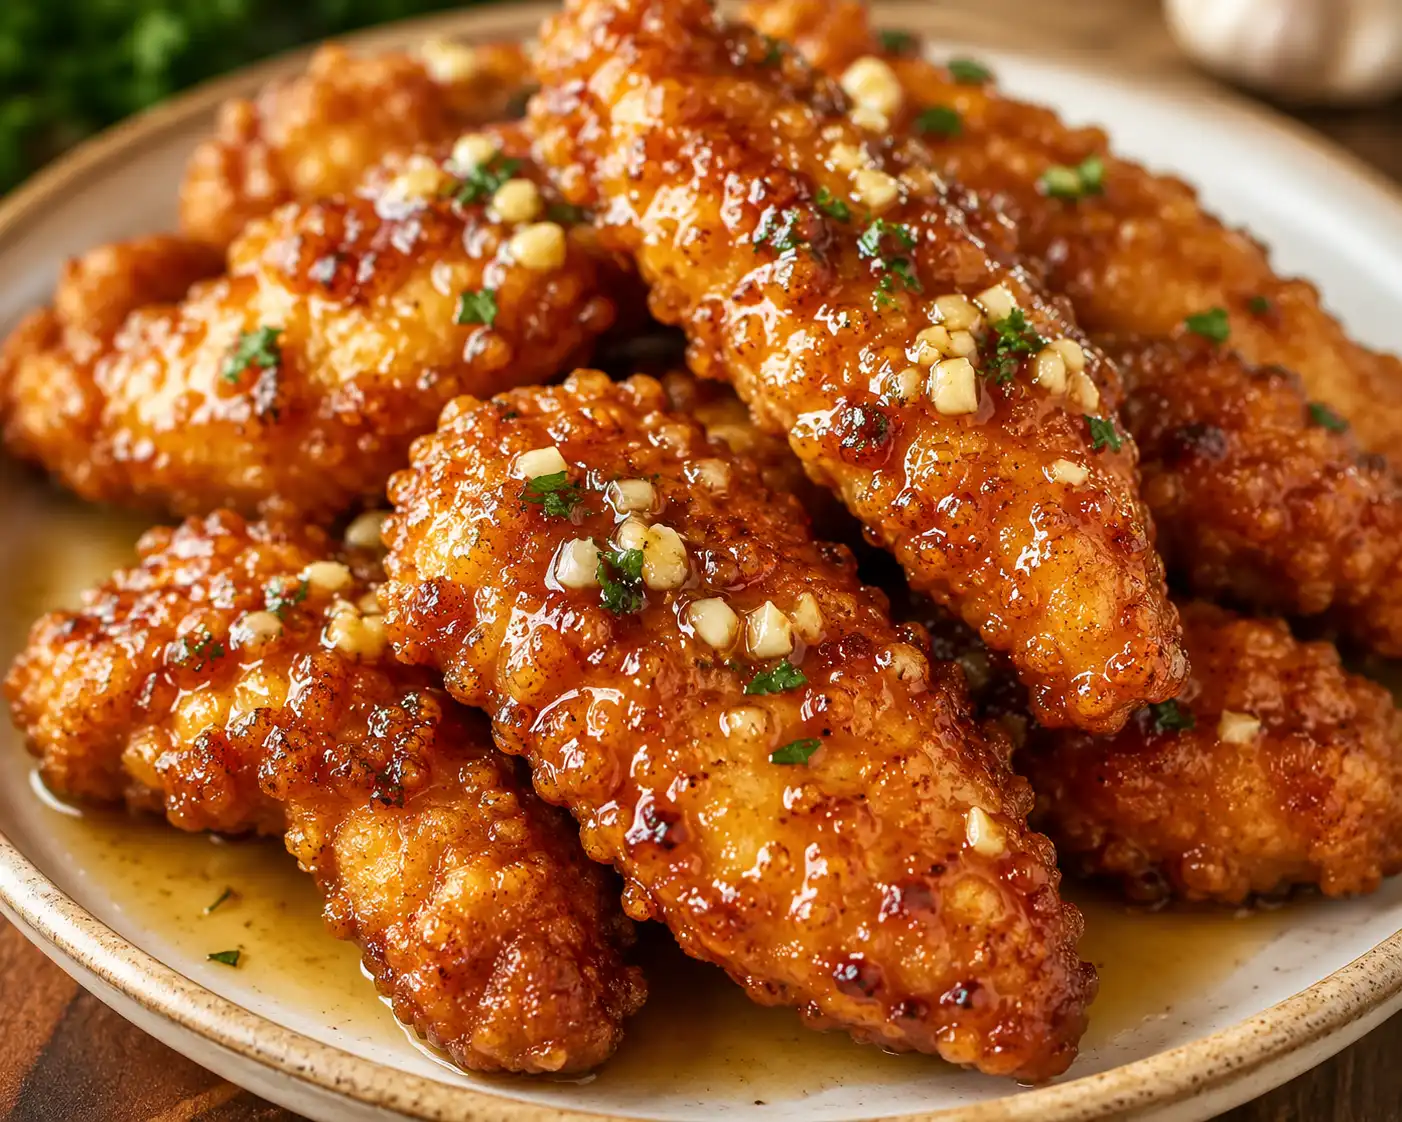
There is a specific kind of magic that happens when crispy, golden-brown fried chicken meets a glaze that is simultaneously sweet, savory, and aromatic. Crispy and Juicy Honey Butter Garlic Chicken Tenders represent the pinnacle of comfort food engineering, offering a sensory experience that satisfies cravings on every level. The exterior shatters under the bite, revealing a tender, moist interior that has been protected by a perfectly seasoned crust. Meanwhile, the honey butter garlic sauce clings to every ridge and crag of the breading, delivering a punch of umami richness balanced by the floral sweetness of honey and the pungent warmth of fresh garlic.
This dish is not merely about throwing chicken into a pan; it is about mastering the balance of textures and flavors. It is a meal that works equally well as a weeknight family dinner, a standout appetizer for a game day gathering, or a luxurious treat when you need a culinary hug. The versatility of chicken tenders allows for endless customization, but the honey butter garlic combination remains a timeless classic that appeals to both children and adults. Whether you are a seasoned home cook or a beginner looking to impress, mastering this recipe opens the door to a world of flavor possibilities that transcend typical fried chicken norms.
In this comprehensive guide, we will explore every facet of creating the perfect Honey Butter Garlic Chicken Tenders. From the historical roots of the dish to the scientific breakdown of ingredients, you will gain a deep understanding of why each step matters. We will walk through detailed instructions, offer professional tips to ensure consistency, and provide variations to suit dietary needs. By the end of this article, you will not only have a recipe but also the knowledge to execute it flawlessly every single time, ensuring that your chicken is always crispy on the outside and juicy on the inside.
The History
To truly appreciate the Honey Butter Garlic Chicken Tender, one must understand the culinary lineage that brought it to existence. The concept of the chicken tender itself is a relatively modern invention in the grand scope of culinary history. While fried chicken has roots dating back to Scottish immigrants in the American South during the 18th century, the specific cut known as the “tenderloin” or “tender” gained popularity in the United States during the 1970s. It was during this era that restaurants began seeking ways to reduce waste and offer convenient, finger-friendly options that required no cutting. The tenderloin, being the most tender part of the breast, was the perfect candidate for this transformation.
The evolution of the sauce is equally fascinating. Honey garlic sauce has strong ties to Asian cuisine, particularly Chinese and Korean culinary traditions where sweet and savory glazes are staples. As fusion cuisine began to boom in the late 20th century, Western cooks started incorporating these flavor profiles into traditional American comfort foods. The addition of butter is a distinctly Western touch, adding richness and mouthfeel that complements the viscosity of the honey. This amalgamation of Eastern flavor profiles with Southern frying techniques created a hybrid dish that resonated globally.
By the early 2000s, the popularity of chicken tenders had skyrocketed, becoming a menu staple in everything from high-end gastropubs to fast-food chains. The honey butter garlic variation emerged as a premium option, distinguishing itself from standard buffalo or barbecue sauces by offering a more nuanced flavor profile. It signaled a shift in consumer preference toward gourmet comfort food, where quality ingredients like real butter and fresh garlic were prioritized over processed sauces. Today, this dish stands as a testament to the globalization of taste, combining history, culture, and culinary innovation into a single, delicious bite.
Ingredients Breakdown
Understanding the role of each ingredient is crucial for troubleshooting and achieving the best results. This is not just a list of items; it is a blueprint for flavor and texture.
The Chicken
The star of the show is obviously the chicken. While chicken breast can be cut into strips, using actual chicken tenderloins is preferred for their natural shape and uniform thickness. This ensures even cooking, preventing the exterior from burning before the interior is done. The quality of the chicken matters; organic or free-range birds often have better texture and flavor due to their diet and movement. Fresh chicken is always superior to frozen, as freezing can damage cell walls and release moisture during cooking, potentially affecting the crispiness of the crust.
The Brine and Marinade
Before breading, the chicken benefits immensely from a buttermilk soak. Buttermilk is acidic, which helps break down tough protein strands in the meat, resulting in a more tender bite. Additionally, the thickness of buttermilk helps the flour mixture adhere better to the chicken. Salt is essential here not just for flavor, but for moisture retention through the process of osmosis. Some recipes include egg in the wash, which acts as a binder, creating a glue-like layer that ensures the breading stays put during the violent agitation of frying.
The Breading
The crispiness of the tender comes down to the flour mixture. All-purpose flour provides structure, but adding cornstarch is the secret weapon for extra crunch. Cornstarch has a lower protein content than wheat flour, which inhibits gluten formation and creates a lighter, crispier crust. Seasonings like paprika, onion powder, and black pepper are mixed directly into the flour to ensure every bite is seasoned, rather than just the surface of the meat. A double-dredge technique, where the chicken is coated, dipped in liquid, and coated again, creates a shaggy, textured surface that maximizes crispiness.
The Honey Butter Garlic Sauce
This sauce is an emulsion of fat and sugar. Unsalted butter is recommended so you can control the sodium levels, as soy sauce or salt will be added later. The butter provides a creamy base that carries the flavor of the garlic. Fresh garlic is non-negotiable; jarred garlic contains preservatives and water that can dilute the sauce and lacks the pungent kick of freshly minced cloves. Honey adds sweetness and viscosity, helping the sauce glaze the chicken rather than sliding off. A splash of soy sauce adds umami depth and color, balancing the sweetness of the honey.
The Frying Oil
The choice of oil impacts both flavor and health. Oils with a high smoke point are essential for frying at the necessary temperatures (around 350°F to 375°F). Vegetable oil, canola oil, or peanut oil are excellent choices. Olive oil should be avoided for deep frying as it burns at lower temperatures and can impart a bitter taste. The oil must be fresh; used oil can transfer flavors from previous cooking sessions and may break down, leading to greasy chicken.
Step-by-Step Recipe
Executing this recipe requires attention to detail and timing. Follow these steps to ensure perfection.
Phase 1: Preparation
Begin by preparing your workstation. Set up a breading station with three shallow bowls: one for flour mixture, one for buttermilk and egg wash, and one for the second coat of flour. Pat the chicken tenders completely dry with paper towels before starting. Moisture is the enemy of crispiness; if the chicken is wet, the breading will slide off. Season the chicken lightly with salt and pepper before dipping it into the buttermilk mixture. Let them soak for at least 30 minutes in the refrigerator. This tenderizes the meat and allows the flavors to penetrate.
Phase 2: Breading
Whisk together your dry ingredients in the first bowl. Take a tender from the buttermilk, let the excess drip off slightly, and dredge it in the flour. Press the flour into the meat firmly. Dip it back into the buttermilk briefly, then return it to the flour for a second coat. This double-dredging creates those nooks and crannies that become extra crispy. Place the breaded tenders on a wire rack rather than a plate. This allows air to circulate around the chicken, preventing the bottom from becoming soggy while you finish breading the rest of the batch.
Phase 3: Frying
Heat your oil in a heavy-bottomed pot or deep fryer. Use a thermometer to monitor the temperature carefully. If the oil is too cool, the chicken will absorb grease and become soggy. If it is too hot, the outside will burn before the inside cooks. Gently lower the tenders into the oil, being careful not to overcrowd the pot. Overcrowding drops the oil temperature drastically. Fry for about 3 to 4 minutes per side until golden brown and the internal temperature reaches 165°F. Remove and place on a wire rack over a baking sheet to drain. Do not use paper towels directly on the chicken, as this can trap steam and soften the crust.
Phase 4: Saucing
While the chicken rests, prepare the sauce. In a skillet over medium heat, melt the butter. Add the minced garlic and sauté for about a minute until fragrant, being careful not to burn it. Burnt garlic tastes bitter and will ruin the sauce. Add the honey, soy sauce, and any other seasonings. Let the mixture simmer for a few minutes until it thickens slightly. You can toss the chicken in the sauce immediately for a fully coated experience, or serve the sauce on the side for dipping to maintain maximum crispiness. Garnish with fresh parsley or sesame seeds for presentation.
Tips
Achieving restaurant-quality results at home often comes down to small adjustments and professional secrets. Here are essential tips to elevate your Honey Butter Garlic Chicken Tenders.
- Temperature Control: Invest in a deep-fry thermometer. Guessing the oil temperature is the most common cause of failure. Maintain 350°F to 375°F throughout the cooking process.
- Resting the Meat: After frying, let the chicken rest for 5 minutes before saucing or serving. This allows the juices to redistribute throughout the meat, ensuring every bite is juicy.
- Garlic Management: Garlic burns quickly. When making the sauce, keep the heat at medium or medium-low. If the garlic starts to brown too fast, remove the pan from the heat momentarily.
- Oil Safety: Never leave hot oil unattended. Keep a box of baking soda nearby in case of a grease fire, as water will exacerbate the situation.
- Crispiness Preservation: If you need to keep the chicken warm while finishing batches, place them in an oven set to 200°F on a wire rack. Do not cover them with foil, as trapped steam will ruin the crunch.
- Seasoning Layers: Season the flour, season the buttermilk, and season the chicken. Layering salt ensures the flavor is distributed throughout the entire bite, not just on the surface.
- Sauce Consistency: If the sauce is too thin, mix a teaspoon of cornstarch with water and add it to the simmering sauce to thicken it. If it is too thick, add a splash of water or chicken broth.
Variations and Customizations
While the classic recipe is divine, there are numerous ways to adapt this dish to suit different palates and dietary requirements.
Spicy Honey Butter Garlic
For those who enjoy heat, add red pepper flakes, cayenne pepper, or a splash of Sriracha to the sauce. The sweetness of the honey pairs beautifully with spice, creating a addictive sweet-heat profile similar to Nashville hot chicken but with a garlic twist.
Baked Version
To reduce oil consumption, you can bake the tenders. Place the breaded chicken on a wire rack over a baking sheet. Spray generously with cooking oil spray. Bake at 400°F for about 20 minutes, flipping halfway through. While not quite as crispy as fried, this method offers a healthier alternative with satisfying results.
Air Fryer Method
Air fryers are excellent for this recipe. Arrange the breaded tenders in a single layer in the basket. Cook at 375°F for 10 to 12 minutes, shaking the basket halfway through. This method uses significantly less oil and cleans up much easier than deep frying.
Gluten-Free Adaptation
Swap the all-purpose flour for a gluten-free flour blend or almond flour. Ensure your cornstarch and soy sauce (use tamari) are certified gluten-free. The texture may vary slightly, but the flavor remains intact.
Sauce Variations
Experiment with the sauce by adding lemon juice for acidity, ginger for a zesty kick, or balsamic vinegar for depth. You can also add chopped green onions or cilantro to the finished dish for freshness.
Health Considerations and Nutritional Value
It is important to approach comfort food with balance. While this dish is indulgent, understanding its nutritional profile helps in making informed dietary choices.
Caloric Content
A standard serving of fried chicken tenders with honey butter sauce is calorie-dense. The majority of calories come from the frying oil absorbed by the breading and the sugar content in the honey and butter. A typical serving of 4 tenders with sauce can range from 500 to 700 calories depending on size and preparation method.
Macronutrients
Chicken is an excellent source of lean protein, essential for muscle repair and satiety. However, the breading adds carbohydrates, and the sauce adds fats and sugars. To improve the macro balance, consider serving the tenders with a large side of steamed vegetables or a fresh green salad to increase fiber intake without adding significant calories.
Sodium Levels
Soy sauce and added salt can make this dish high in sodium. Individuals monitoring blood pressure should use low-sodium soy sauce and reduce the amount of added salt in the breading mixture. Fresh herbs can be used to boost flavor without relying on salt.
Heart Health
Deep frying introduces trans fats and saturated fats depending on the oil used. Using oils high in monounsaturated fats, like avocado oil or peanut oil, is a healthier choice. Alternatively, baking or air frying significantly reduces the fat content, making the dish more heart-friendly.
Sugar Content
Honey is a natural sweetener but still contributes to sugar intake. Diabetics or those watching sugar intake should moderate the portion size of the sauce or use a sugar-free honey substitute.
Ingredients
- Chicken: 1 pound of chicken tenderloins, fresh and trimmed.
- Buttermilk: 1 cup, full-fat preferred for richness.
- Egg: 1 large egg, beaten to bind the coating.
- All-Purpose Flour: 1.5 cups for the primary breading structure.
- Cornstarch: 0.5 cup to ensure extra crispiness.
- Garlic Powder: 1 teaspoon for the dry rub.
- Paprika: 1 teaspoon for color and mild smoke flavor.
- Salt: 1 teaspoon, divided for chicken and flour.
- Black Pepper: 0.5 teaspoon, freshly ground.
- Vegetable Oil: 4 cups for deep frying.
- Unsalted Butter: 4 tablespoons for the sauce.
- Fresh Garlic: 4 cloves, minced finely.
- Honey: 0.5 cup, pure honey works best.
- Soy Sauce: 1 tablespoon for umami depth.
- Parsley: Fresh chopped, for garnish.
- Sesame Seeds: Optional, for texture and presentation.
Directions
- In a medium bowl, whisk together the buttermilk and beaten egg. Place the chicken tenders into the mixture, ensuring they are fully submerged. Cover and refrigerate for at least 30 minutes.
- In a separate shallow dish, combine the all-purpose flour, cornstarch, garlic powder, paprika, salt, and black pepper. Whisk until evenly distributed.
- Remove the chicken from the buttermilk mixture. Dredge each tender in the flour mixture, pressing firmly. Dip back into the buttermilk briefly, then dredge in the flour mixture again. Place on a wire rack.
- Heat the vegetable oil in a large pot or deep fryer to 350°F. Use a thermometer to monitor the heat.
- Carefully lower the chicken tenders into the hot oil in batches. Do not overcrowd the pot. Fry for 3 to 4 minutes per side until golden brown and cooked through (internal temperature of 165°F).
- Remove the chicken and place on a wire rack to drain excess oil. Let rest for 5 minutes.
- While the chicken rests, melt the butter in a skillet over medium heat. Add the minced garlic and sauté for 1 minute until fragrant.
- Stir in the honey and soy sauce. Simmer for 2 to 3 minutes until the sauce thickens slightly.
- Toss the fried chicken tenders in the sauce until fully coated, or serve the sauce on the side for dipping.
- Garnish with fresh parsley and sesame seeds. Serve immediately while hot and crispy.
FAQ
Can I make these chicken tenders ahead of time?
It is best to serve them fresh. However, you can bread the chicken and keep it on a rack in the refrigerator for up to 4 hours before frying. Reheating fried chicken often results in a loss of crispiness, but using an air fryer or oven at 400°F can help restore some texture.
Why did my breading fall off the chicken?
This usually happens if the chicken was too wet before breading or if the oil temperature was too low. Ensure you pat the chicken dry before the buttermilk soak and maintain proper oil heat during frying.
Can I use chicken breast instead of tenderloins?
Yes, simply cut chicken breasts into strips of equal thickness to ensure even cooking. Pound them slightly if they are uneven to help them cook uniformly.
How do I store leftovers?
Store leftovers in an airtight container in the refrigerator for up to 3 days. Reheat in an oven or air fryer rather than a microwave to maintain crispiness.
Is there a substitute for buttermilk?
If you do not have buttermilk, you can make a substitute by adding 1 tablespoon of lemon juice or vinegar to 1 cup of regular milk. Let it sit for 5 minutes to curdle before using.
Can I freeze the cooked tenders?
Yes, you can freeze cooked tenders for up to 3 months. Place them in a single layer on a baking sheet to freeze individually before transferring to a freezer bag. Reheat from frozen in the oven.
Summary
Crispy and Juicy Honey Butter Garlic Chicken Tenders combine a perfectly seasoned, double-dredged crust with a sweet and savory glaze for the ultimate comfort food experience.
Mastering the oil temperature and sauce balance ensures a dish that is consistently crunchy on the outside, tender on the inside, and bursting with flavor.