Introduction
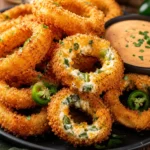
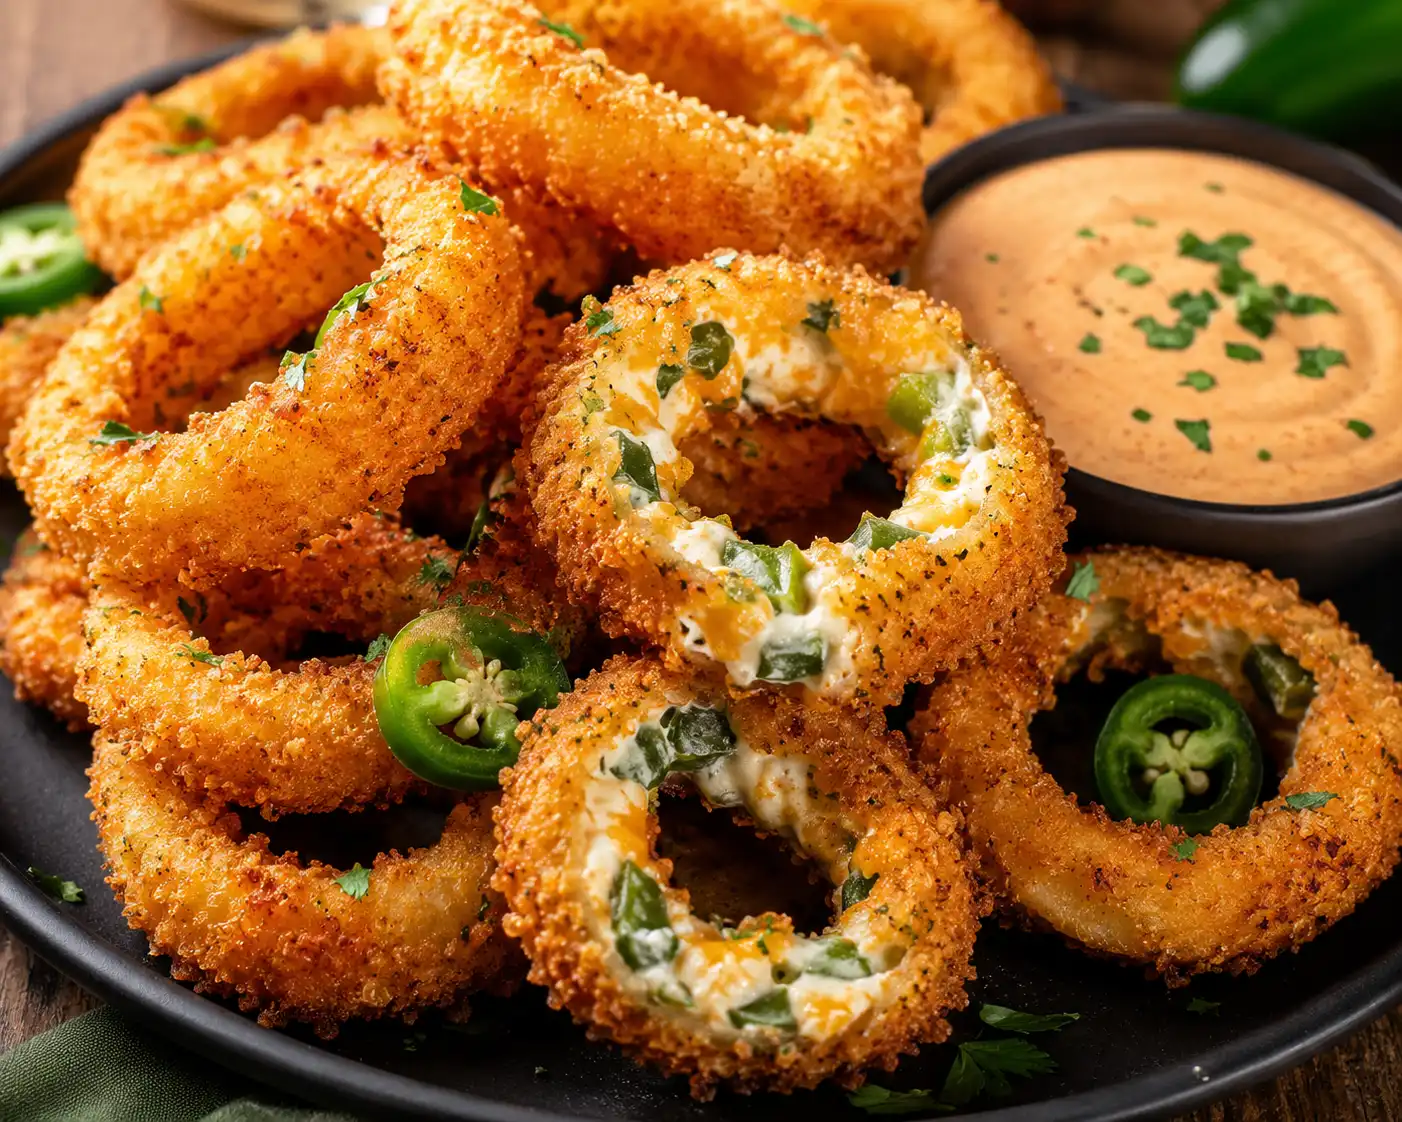
Welcome to the ultimate fusion of two legendary appetizer classics: the golden, crunchy perfection of onion rings and the fiery, creamy indulgence of jalapeño poppers. Crispy Jalapeño Popper Onion Rings are not merely a snack; they are a culinary experience designed to tantalize every taste bud. Imagine biting into a thick, sweet onion ring that shatters with a golden crunch, only to be met with a molten core of seasoned cream cheese, sharp cheddar, and diced spicy jalapeños. This dish bridges the gap between comfort food and gourmet bar fare, offering a symphony of textures and flavors that is impossible to resist.
Whether you are hosting a game day party, looking for a show-stopping starter for a dinner gathering, or simply craving something spicy and savory for a weekend treat, this recipe delivers. The contrast between the caramelized sweetness of the fried onion and the tangy heat of the pepper creates a balance that keeps you coming back for more. In this comprehensive guide, we will explore every aspect of creating this masterpiece, from the historical origins of the components to the nutritional breakdown, ensuring you have all the knowledge needed to craft the perfect batch.
The History
To truly appreciate this dish, one must understand the lineage of its two primary components. The onion ring is believed to have originated in the United States during the early 20th century. While there are competing claims, with some recipes appearing in cookbooks as early as 1933, they gained massive popularity in the 1940s and 50s as a staple side dish in diners and drive-ins across America. The concept of battering and frying vegetables was not new, but the onion ring became an icon of American fast food culture, symbolizing the era’s love for deep-fried comfort.
On the other side of the flavor spectrum lies the jalapeño popper. This spicy delight emerged later, gaining traction in the 1980s. Originally, poppers were whole jalapeño peppers stuffed with cheese, wrapped in bacon, and grilled or fried. They quickly became a fixture in sports bars and Tex-Mex restaurants, beloved for their ability to deliver a quick punch of heat followed by cooling creaminess. The fusion of these two items—the onion ring and the popper—is a product of modern gastropub innovation. As chefs began experimenting with “stuffing” techniques for fried foods in the 2000s, the idea of injecting the popper filling directly into the center of an onion ring was born, creating a hybrid appetizer that honors the history of both while creating something entirely new.
Ingredients Breakdown
Understanding the role of each ingredient is crucial for mastering this recipe. It is not just about mixing items together; it is about chemistry and flavor profiling.
The Onion
The foundation of this dish is the onion itself. We recommend using Vidalia or Sweet Yellow Onions. These varieties have a higher sugar content and lower sulfur levels than standard white onions. When fried, this natural sugar caramelizes, providing a sweet counterpoint to the spicy filling. The structural integrity of the ring is also vital; you need onions that are firm enough to hold the filling without collapsing in the fryer.
The Filling
The heart of the popper experience lies in the cheese blend. Cream cheese provides the creamy, tangy base that melts smoothly. However, cream cheese alone can be too soft. We blend it with sharp cheddar for flavor depth and Monterey Jack for superior meltability. The fresh jalapeños within the filling provide the heat. Using fresh peppers rather than pickled ensures a crisp vegetal note rather than a vinegar tang, which complements the onion better.
The Breading Station
A triple-coating method is essential for maximum crunch. All-purpose flour acts as the primer, helping the egg wash adhere to the moist onion. The egg wash acts as the glue. Finally, Panko breadcrumbs are preferred over standard breadcrumbs because they are larger and flakier, absorbing less oil and creating a lighter, airier crunch that stays crispy longer.
Step-by-Step Recipe
Creating these rings requires patience and precision. Follow this narrative guide to understand the flow of the cooking process before diving into the specific measurements later in the post.
Preparation Phase: Begin by prepping your workspace. Deep frying requires attention, so ensure all ingredients are measured and ready before you heat the oil. Start by slicing your onions into thick rings, approximately half an inch wide. Carefully remove the inner membranes to create a hollow trough where the filling will sit. This step requires a gentle touch to ensure the outer ring remains intact.
Filling the Rings: Mix your softened cream cheese with shredded cheeses and diced jalapeños. Season this mixture generously with garlic powder, onion powder, and a pinch of cayenne. Using a piping bag or a small spoon, fill the trough of the onion ring. Do not overfill, or the cheese will leak during frying. Once filled, place the rings in the freezer for at least 30 minutes. This is a critical step; freezing solidifies the cheese, preventing it from melting out before the batter sets.
Battering Process: Set up three bowls: one with seasoned flour, one with beaten eggs, and one with Panko breadcrumbs. Take the frozen rings and dredge them in flour, shaking off the excess. Dip them into the egg, ensuring full coverage. Finally, press them firmly into the Panko. For an extra-thick crust, you can repeat the egg and breadcrumb step. Place the breaded rings back on a tray and freeze them again for another 15 minutes. This double-freeze method locks the breading in place.
Frying to Perfection: Heat your oil to 375°F (190°C). Use a deep-fry thermometer to monitor the temperature closely. If the oil is too cool, the rings will absorb grease and become soggy. If it is too hot, the outside will burn before the onion cooks. Fry the rings in small batches to avoid overcrowding, which drops the oil temperature. Cook until golden brown, usually about 3 to 4 minutes. Drain on a wire rack rather than paper towels to maintain crispiness on all sides.
Tips
To elevate your cooking from good to exceptional, consider these professional tips and tricks:
- Oil Temperature Control: The most common mistake is adding too many rings at once. This causes the oil temperature to plummet, resulting in greasy food. Fry in small batches of 3 to 4 rings.
- The Freeze is Key: Do not skip the freezing steps. The filling must be rock hard when it hits the hot oil. If the cheese is soft, it will leak out into the oil, causing splattering and losing the creamy center.
- Season the Flour: Don’t use plain flour for the dredge. Add salt, pepper, and paprika to the flour mixture. This ensures the seasoning penetrates the crust, not just the filling.
- Wire Rack Draining: Avoid stacking fried food on paper towels. The steam gets trapped underneath, making the bottom soggy. A wire cooling rack allows air to circulate, keeping the crunch intact.
- Choose the Right Oil: Use an oil with a high smoke point, such as peanut oil, canola oil, or vegetable oil. Olive oil burns too quickly at frying temperatures and will impart a bitter taste.
Variations and Customizations
While the classic recipe is divine, there are numerous ways to customize this dish to fit dietary needs or flavor preferences:
Bacon Lover’s Edition
For a smoky twist, mix crumbled, cooked bacon bits directly into the cheese filling. You can also wrap the exterior of the breaded ring with a half-slice of bacon before frying, though this requires careful temperature management to cook the bacon through without burning the crumbs.
Gluten-Free Adaptation
To make this dish gluten-free, substitute the all-purpose flour with a 1:1 gluten-free baking flour blend. Ensure your Panko breadcrumbs are replaced with gluten-free crushed cornflakes or certified gluten-free breadcrumbs. Always check the labels on your spices and cheese to ensure no cross-contamination.
Baked or Air Fryer Option
If you wish to reduce the oil, you can bake these at 400°F (200°C) for 20 minutes, flipping halfway through. Spray generously with cooking oil spray to encourage browning. Alternatively, an air fryer works well at 380°F for 12-15 minutes. Note that the texture will be slightly less crunchy than deep-fried versions.
Spice Level Adjustment
Control the heat by managing the jalapeños. For mild rings, remove all seeds and white membranes from the peppers before dicing. For extreme heat, leave some seeds in or add a dash of cayenne pepper or hot sauce to the cheese mixture.
Health Considerations and Nutritional Value
It is important to approach this recipe with a balanced perspective. As a deep-fried appetizer stuffed with cheese, this dish is energy-dense. The primary sources of calories come from the carbohydrates in the breading and onion, and the fats from the cheese and frying oil.
Caloric Density: A single serving (approximately 3-4 rings) can range from 400 to 600 calories depending on the size of the onion and the amount of oil absorbed. Fat Content: The cream cheese and cheddar contribute saturated fats. While delicious, these should be consumed in moderation as part of a balanced diet. Sodium: Processed cheeses and added salts can make this dish high in sodium. To mitigate this, use low-sodium cheese varieties and reduce the added salt in the breading.
Nutritional Benefits: Onions are not just flavor carriers; they contain antioxidants like quercetin, which has anti-inflammatory properties. They also provide Vitamin C and B vitamins. Jalapeños contain capsaicin, which can boost metabolism and provide pain-relieving properties. While this is not a “health food,” enjoying it occasionally as part of a varied diet that includes plenty of vegetables and lean proteins is perfectly reasonable.
Ingredients
Below is the precise shopping list required to create approximately 12 to 15 stuffed onion rings.
- Onions: 2 large Vidalia or sweet yellow onions (peeled and sliced into 1/2-inch rings)
- Cream Cheese: 8 ounces, softened to room temperature
- Cheddar Cheese: 1 cup, sharp cheddar, shredded finely
- Monterey Jack Cheese: 1/2 cup, shredded finely
- Jalapeños: 3 to 4 fresh jalapeños, seeds removed and finely diced
- Garlic Powder: 1 teaspoon
- Onion Powder: 1 teaspoon
- Paprika: 1/2 teaspoon (smoked paprika preferred for depth)
- Salt: 1 teaspoon (divided for filling and breading)
- Black Pepper: 1/2 teaspoon, freshly cracked
- All-Purpose Flour: 1 cup, for dredging
- Eggs: 3 large eggs, beaten with 1 tablespoon of water
- Panko Breadcrumbs: 2 cups, for coating
- Vegetable or Peanut Oil: 6 cups, for deep frying
- Optional Garnish: Fresh cilantro or ranch dressing for serving
Directions
- Prepare the Onions: Slice the onions into thick 1/2-inch rings. Gently push out the inner layers to create a hollow well in the center of each ring, leaving the outer 2-3 layers intact to hold the shape. Separate the rings and set aside.
- Make the Filling: In a medium mixing bowl, combine the softened cream cheese, shredded cheddar, shredded Monterey Jack, diced jalapeños, garlic powder, onion powder, paprika, 1/2 teaspoon salt, and black pepper. Mix until fully combined and uniform.
- Stuff the Rings: Using a piping bag or a small spoon, fill the hollow trough of each onion ring with the cheese mixture. Pack it down gently to ensure there are no air pockets. Do not overfill above the rim of the onion.
- First Freeze: Place the stuffed onion rings on a baking sheet lined with parchment paper. Place the sheet in the freezer for at least 30 minutes, or until the cheese filling is completely solid.
- Set Up Breading Station: Prepare three shallow bowls. Bowl 1: Flour mixed with 1/2 teaspoon salt. Bowl 2: Beaten eggs and water. Bowl 3: Panko breadcrumbs.
- Bread the Rings: Remove rings from the freezer. Dredge each ring in the flour, shaking off excess. Dip into the egg wash, allowing excess to drip off. Press firmly into the Panko breadcrumbs, ensuring full coverage. For extra crunch, dip in egg and Panko a second time.
- Second Freeze: Place the breaded rings back on the baking sheet and return to the freezer for 15 minutes. This sets the breading.
- Heat the Oil: In a heavy-bottomed pot or deep fryer, heat the oil to 375°F (190°C). Use a thermometer to monitor the heat.
- Fry: Carefully lower 3 to 4 rings into the hot oil at a time. Fry for 3 to 4 minutes, turning occasionally, until the coating is deep golden brown and crispy.
- Drain and Serve: Remove from oil and place on a wire cooling rack. Let cool for 2 minutes before serving to allow the cheese to set slightly. Serve immediately with ranch or blue cheese dressing.
FAQ
Can I make these ahead of time?
Yes, you can prepare the stuffed and breaded rings up to 24 hours in advance. Keep them on a baking sheet in the freezer, covered with plastic wrap. Fry them directly from frozen when you are ready to serve. Do not thaw them before frying, or the cheese will leak.
How do I prevent the breading from falling off?
The key is the freezing steps and pressing the breadcrumbs firmly. Ensure the onion is dry before stuffing, and make sure the egg wash fully coats the flour layer. The double-freeze method creates a solid barrier that holds the breading during the frying process.
Can I reuse the frying oil?
Yes, once the oil has cooled completely, you can strain it through a cheesecloth or fine-mesh sieve to remove food particles. Store it in a sealed container in a cool, dark place. It can be reused 2 to 3 times, provided it does not smell burnt or look dark.
What if I don’t have a deep-fry thermometer?
If you lack a thermometer, you can test the oil by dropping a single breadcrumb into it. If it sizzles immediately and floats to the top while turning golden within 60 seconds, the oil is ready. If it burns instantly, it is too hot; if it sinks, it is too cool.
Are these suitable for vegetarians?
Yes, this recipe is vegetarian-friendly as it contains no meat products. However, ensure you check the rennet source in your cheese if you are adhering to strict vegetarian dietary guidelines, as some cheeses use animal-derived rennet.
How long do leftovers last?
Fried foods are best eaten immediately. However, leftovers can be stored in an airtight container in the refrigerator for up to 2 days. Reheat them in an oven or air fryer at 350°F to restore crispiness. Microwaving is not recommended as it will make the breading soggy.
Summary
Crispy Jalapeño Popper Onion Rings combine sweet fried onions with a spicy, creamy cheese filling for the ultimate appetizer.
Follow the double-freeze method and maintain oil temperature for a perfect golden crunch every time.